Watch the demo of the end state
What you need
- •A Clay account (any plan works)
- •A Flint account (sign up at tryflint.com)
Step-by-step setup
Follow these steps to set up personalized landing pages with Clay and Flint.
Step 1: Sign up for Flint and create your ABM template
- 1.Sign up for Flint at tryflint.com
- 2.Create a landing page template in the Flint editor. This is the base design that Flint will personalize for each prospect. Use dynamic fields like company name, industry, pain points, and relevant use cases to make each page feel tailored.
- 3.Note your template's page slug. The templatePageSlug is the URL path of your template page in Flint. For example, if your template page lives at yoursite.com/abm/template, then the templatePageSlug is
/abm/template. You can find this in the Flint editor by looking at the page's URL slug in the page settings. This is the slug you'll paste into the Clay workbook later in Step 4. - 4.Go to https://app.tryflint.com/app/team to grab your Site ID and API Key. You'll need both of these when configuring the Clay workbook.
Variables you'll need
Keep these handy as you work through the setup:
| Variable | Where to find it | Used in |
|---|---|---|
| Site ID | Settings page at app.tryflint.com/app/team | Step 4 (API request body) |
| API Key | Settings page at app.tryflint.com/app/team | Step 5 (Authorization header) |
| Template Page Slug | The URL path of your template page in Flint (e.g. /abm/template) | Step 4 (API request body) |
| Webhook URL | "Flint Automation Results" table in Clay. Click "Pull in data from a webhook" | Step 3 (API request body) |
Step 2: Duplicate the Clay template
Duplicate our pre-built Clay workbook: https://app.clay.com/shared-workbook/share_0tbyyqiFmTTxXNf3gdX
How the workbook works: The workbook has two tables that work together. The "ABM Targets - Demo" table calls the Flint API with enriched prospect data. Once Flint finishes generating a page, it sends a webhook to the "Flint Automation Results" table, which creates a new row per webhook. The "ABM Targets - Demo" table automatically looks for the corresponding row in "Flint Automation Results" 5 minutes after the initial request.
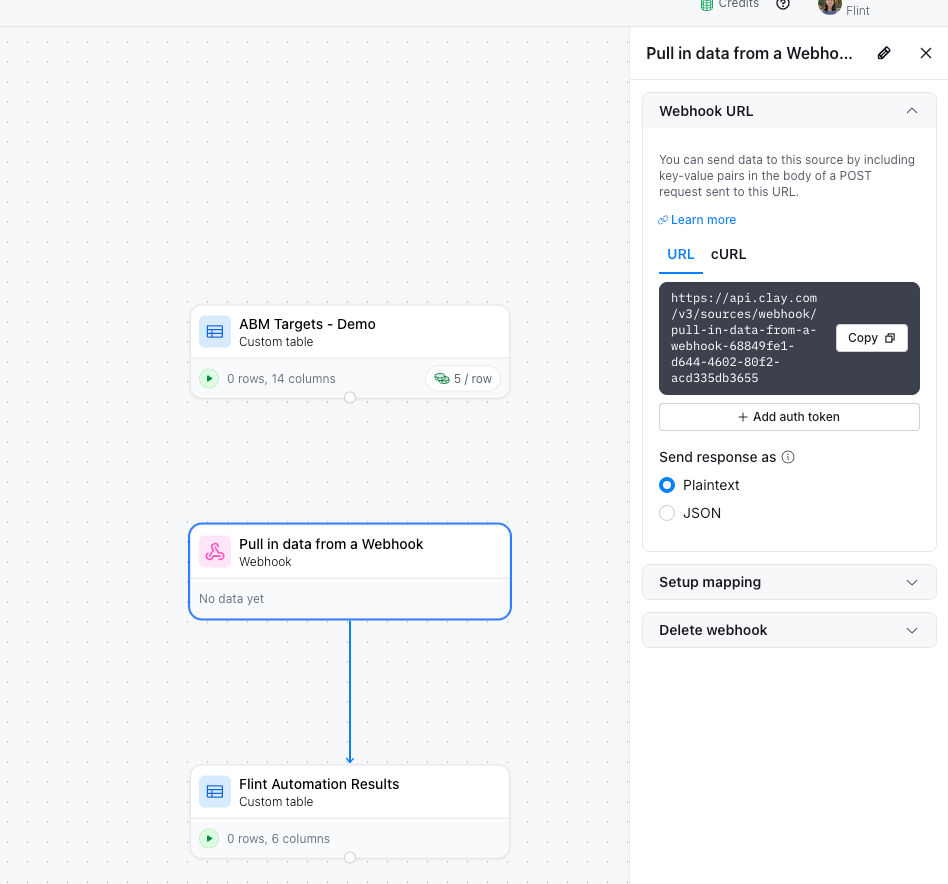
Step 3: Configure the webhook
Go to the "Flint Automation Results" table (second tab at the bottom). Click "Pull in data from a webhook" and copy the Webhook URL.
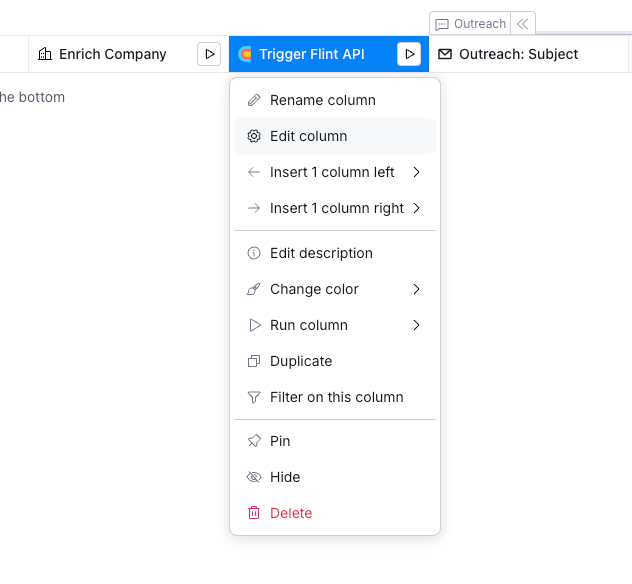
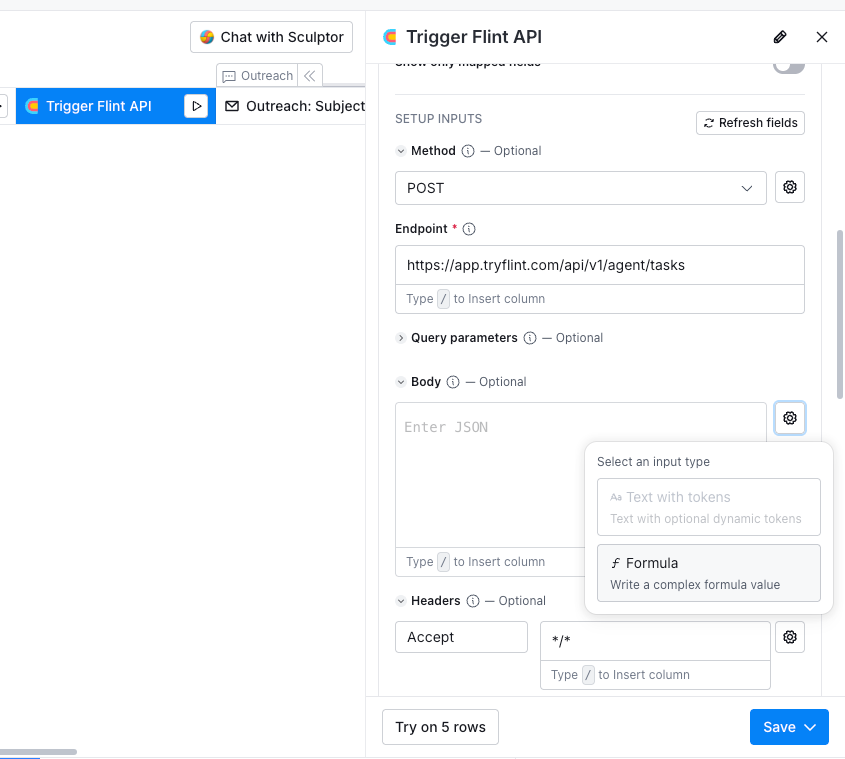
Then go back to the "ABM Targets - Demo" table. Click the "Trigger Flint API" column header, click the gear icon, and select "Edit column". In the Body section, click the gear icon and select "Formula".
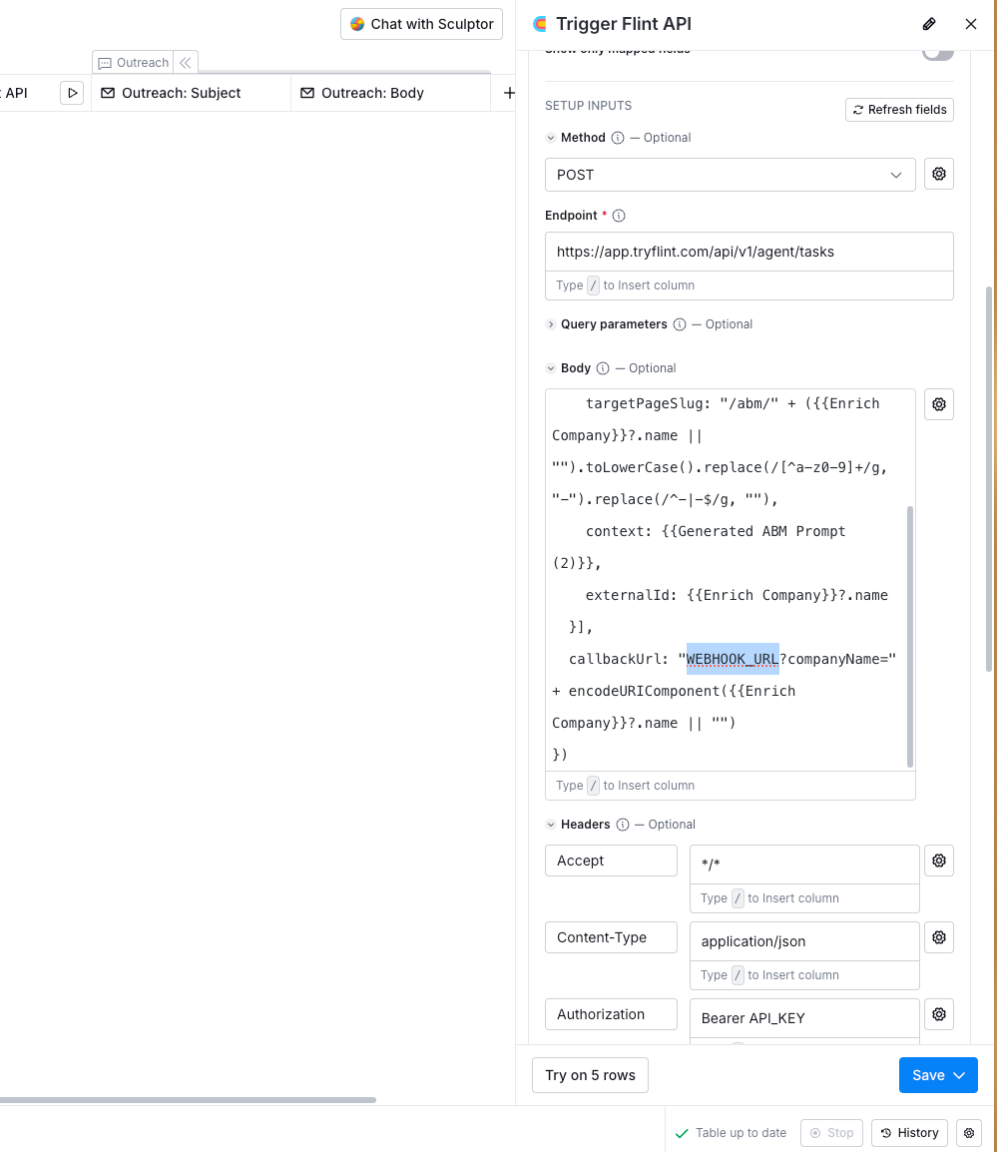
Scroll down to "callbackUrl" and replace WEBHOOK_URL with the webhook URL you copied.
Step 4: Add your Site ID and template slug
While in the Body formula, key in your Site ID into the "siteId" field and your template page slug into "templatePageSlug".
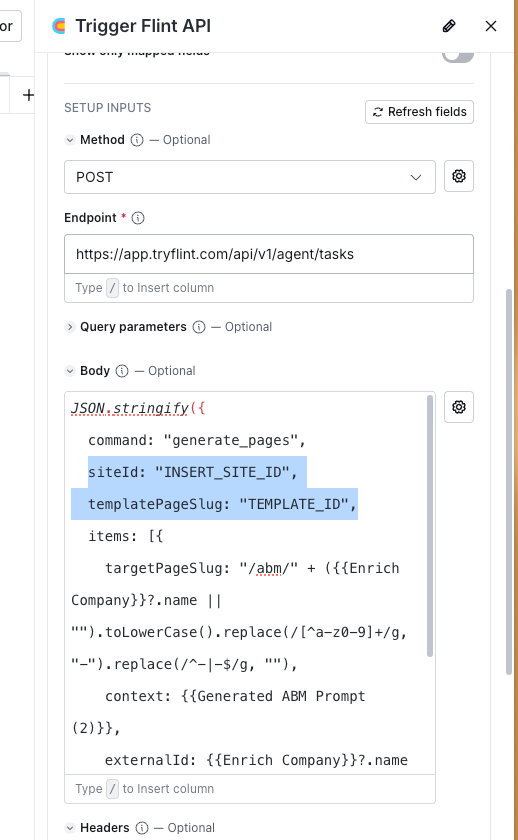
Step 5: Add your API key
Still in the "Trigger Flint API" column editor, go to Authorization. You'll see "Bearer API_KEY" - replace API_KEY with your actual API key from https://app.tryflint.com/app/team.
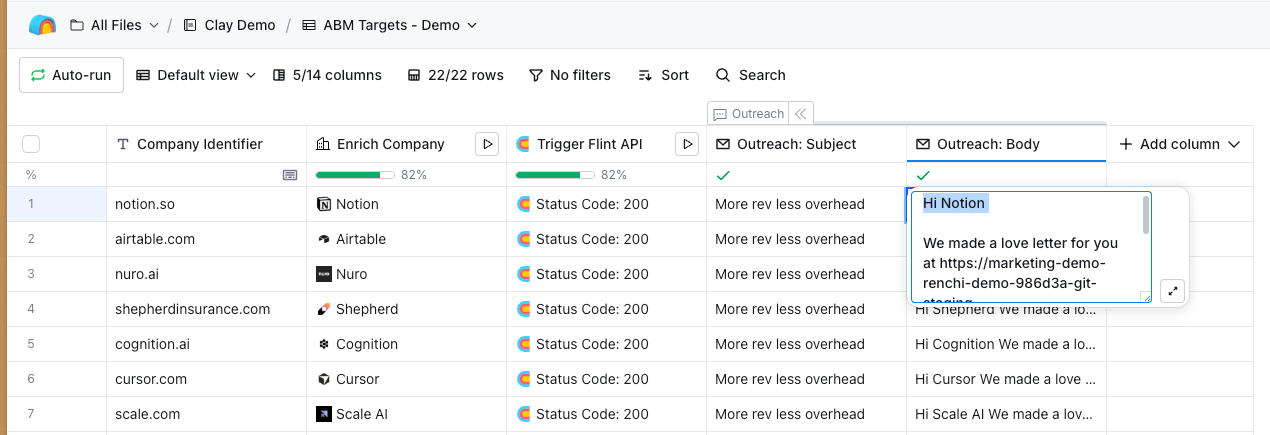
Step 6: Add prospects and run
Add a company domain in the first column of the "ABM Targets - Demo" table. The table will start running automatically - enriching the data and triggering Flint to generate a personalized landing page. The template also includes a personalized outbound email copy column that autopopulates email copy with the generated page URL.
Tips for better results
- •Use at least 3-4 enrichment signals for richer personalization
- •Keep your Flint page template focused on one CTA
- •Test with a small batch (10-20 prospects) before scaling